How to Handle Floor Scratches Before Sanding

Dealing with scratches on your wooden floors is a crucial step before starting the sanding process. Properly addressing these imperfections ensures a smoother finish and extends the lifespan of your floors. In this guide, we will explore effective techniques to handle floor scratches before sanding, helping you achieve flawless results for your London home.
Understanding Different Types of Scratches
Before you start repairing scratches, it’s important to identify the type of scratches on your floor:
- Surface Scratches: Minor scratches that affect only the finish of the wood.
- Deep Scratches: Scratches that penetrate the wood and require more intensive repair.
Tools and Materials Needed
Gather the necessary tools and materials before you begin:
- Fine-grit sandpaper (120-150 grit)
- Wood filler or wood putty
- Putty knife
- Clean cloth
- Wood stain or touch-up marker (matching the floor colour)
- Protective gear (gloves, mask, goggles)
Steps to Handle Surface Scratches
1. Clean the Area
Start by cleaning the scratched area with a damp cloth to remove any dirt or debris. This ensures that you have a clear view of the scratches and prevents dirt from being embedded into the wood during the repair process.
2. Light Sanding
Gently sand the scratched area with fine-grit sandpaper. Sand in the direction of the wood grain to avoid further damage. This will smooth out the surface and prepare it for the next step.
3. Apply Wood Stain or Touch-Up Marker
If the scratches are still visible after sanding, use a wood stain or touch-up marker that matches the colour of your floor. Apply it to the scratched area and blend it in with a clean cloth. Allow it to dry completely.
Steps to Handle Deep Scratches
1. Clean and Sand the Area
Clean the scratched area with a damp cloth to remove any dirt. Then, use fine-grit sandpaper to smooth out the edges of the scratch, ensuring you sand in the direction of the wood grain.
2. Apply Wood Filler
Use a putty knife to apply wood filler or wood putty to the scratch. Fill the scratch completely and smooth out the surface with the putty knife. Allow the filler to dry according to the manufacturer’s instructions.
3. Sand the Filled Area
Once the filler is dry, sand the area again with fine-grit sandpaper to ensure it is level with the rest of the floor. Sand in the direction of the wood grain for a smooth finish.
4. Stain and Seal
Apply a wood stain that matches the colour of your floor to the repaired area. Blend it in with a clean cloth and allow it to dry. Once dry, apply a sealant or finish to protect the repaired area and ensure it matches the rest of the floor.
Preparing for Sanding
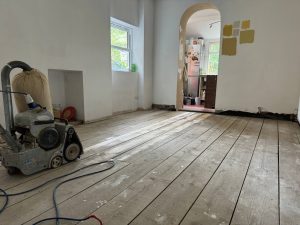
After addressing the scratches, your floor will be ready for the sanding process:
- Clear the Area: Remove all furniture, rugs, and decorations from the room to ensure a smooth sanding process.
- Inspect the Floor: Check the floor for any remaining imperfections or repairs that need attention before sanding.
- Ensure Proper Ventilation: Make sure the room is well-ventilated during the sanding process to minimise dust and ensure a safe working environment.
Conclusion
Handling floor scratches before sanding is essential for achieving a smooth and flawless finish. By following these steps, you can effectively repair both surface and deep scratches, preparing your floors for the sanding process. For professional floor repair and sanding services in London, our team of experts is here to help. Contact us today to learn more about our services and how we can assist with your home improvement projects.


The Costly Mistake of Improper Lead Paint Removal
The Costly Mistake of Improper Lead Paint Removal If your home was built[Read more...]
Floor Sanding for Open-Plan Spaces: Tips and Tricks
Floor Sanding for Open-Plan Spaces: Tips and Tricks Achieve a Seamless and Beautiful Finish[Read more...]
The Importance of Ventilation During Floor Sanding
The Importance of Ventilation During Floor Sanding Expert Tips to Ensure a Safe and[Read more...]
Carpet removal
[Read more...]
The Best Tools and Equipment for DIY Floor Sanding
The Best Tools and Equipment for DIY Floor Sanding Ensure Professional Results in Your[Read more...]
What to Expect During a Floor Sanding Project
What to Expect During a Floor Sanding Project Preparing for a Smooth and Successful[Read more...]
How to Handle Adhesive Residue Before Floor Sanding
How to Handle Adhesive Residue Before Floor Sanding Effective methods to prepare your[Read more...]
Repairs
[Read more...]
Floor Board Restoration
Restoration Whilst you may believe that floor sanding itself is classed as restoration, floor restoration[Read more...]
Wood Floor Maintenance
[Read more...]