The Ultimate Checklist for Floor Sanding Preparation
Ensure a Smooth and Efficient Floor Sanding Process for Your London Home
Introduction
Proper preparation is key to achieving the best results from your floor sanding project. Whether you’re doing it yourself or hiring professionals, following a comprehensive checklist can help you avoid common pitfalls and ensure a smooth process. This ultimate checklist for floor sanding preparation will guide you through the necessary steps to get your London home ready for a successful floor sanding experience.
1. Clear the Area
Remove all furniture, rugs, and personal items from the room to ensure an unobstructed work area:
- Move Furniture: Relocate all furniture to another room or outside the home to provide a clear space for sanding.
- Remove Rugs and Mats: Take out all rugs, mats, and runners to prevent them from getting damaged or dirty.
- Clear Personal Items: Remove any personal items, decorations, and fragile objects to avoid accidents and ensure a tidy workspace.
2. Protect Adjacent Areas
Dust from sanding can spread to other parts of your home. Take steps to protect adjacent areas:
- Seal Doorways: Use plastic sheeting and painter’s tape to seal off doorways and prevent dust from spreading.
- Cover Vents: Cover air vents with plastic to keep dust out of your HVAC system.
- Protect Windows: Close and cover windows to prevent dust from settling on windowsills and frames.
3. Clean the Floor
A clean floor ensures better sanding results and protects your sanding equipment:
- Sweep or Vacuum: Remove loose dirt, dust, and debris from the floor using a broom or vacuum cleaner.
- Mop the Floor: Use a damp mop with a mild cleaner to remove any remaining grime or residue. Allow the floor to dry completely.
4. Inspect and Repair
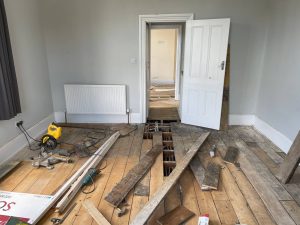
Check your floor for any damage or issues that need to be addressed before sanding:
- Inspect for Damage: Look for loose boards, nails, or deep scratches that need to be repaired.
- Secure Loose Boards: Re-nail or screw down any loose boards to ensure they are firmly in place.
- Fill Gaps and Cracks: Use wood filler to fill in any gaps, cracks, or holes. Allow the filler to dry and then sand it smooth.
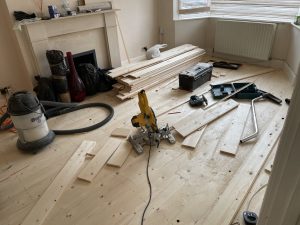
5. Gather Necessary Equipment
Ensure you have all the necessary equipment and supplies for the sanding process:
- Sanding Equipment: Rent or purchase a drum sander, edge sander, and detail sander for a thorough job.
- Sandpaper: Stock up on sandpaper in various grits (coarse, medium, fine) to achieve a smooth finish.
- Protective Gear: Wear a dust mask, safety goggles, and ear protection to protect yourself during sanding.
- Vacuum Cleaner: Have a vacuum cleaner with a HEPA filter on hand to clean up dust between sanding passes.
6. Plan for Ventilation
Proper ventilation is important to keep the work area safe and comfortable:
- Open Windows and Doors: Open windows and doors to ensure good airflow and ventilation.
- Use Fans: Place fans strategically to help circulate air and expel dust from the room.
7. Final Checks
Before starting the sanding process, perform these final checks:
- Double-Check Equipment: Ensure all sanding equipment is in good working condition and you have all necessary supplies.
- Review Safety Measures: Make sure you understand how to use the equipment safely and have taken all necessary precautions.
- Clear Communication: If you’re working with professionals, discuss the plan and ensure everyone is on the same page.


WOOD FLOORING SANDING AND OILING
[Read more...]
How to Handle Floor Stains from Pets
How to Handle Floor Stains from Pets Pets bring joy and companionship to our homes,[Read more...]
Floor sanding and renovation and installation services in Richmond
Richmond: A Jewel of London’s Green Boroughs Richmond is one of London’s most desirable and[Read more...]
Why Professional Floor Sanding is Worth the Investment
Why Professional Floor Sanding is Worth the Investment Discover the Benefits of Hiring Experts[Read more...]
Step-by-Step Floor Sanding Process for Beginners
If you’re a homeowner in London looking to rejuvenate your wooden floors, floor sanding can[Read more...]
How to Extend the Life of Your Sanded Floors
Sanded floors can dramatically enhance the aesthetic appeal and value of your home. To ensure[Read more...]
The Best Maintenance Practices for Sanded Floors in Humid Climates
The Best Maintenance Practices for Sanded Floors in Humid Climates Keep your London home’s[Read more...]
Can You Sand Laminate Floors? Understanding the Limitations
Can You Sand Laminate Floors? Understanding the Limitations Learn How to Maintain and Care[Read more...]
WOOD FLOOR SANDING AND LACQUERING/SEALING
[Read more...]
The Impact of Floor Sanding on Indoor Air Quality
The Impact of Floor Sanding on Indoor Air Quality Maintain a Healthy Home Environment[Read more...]