How to Fix Uneven Floorboards Before Sanding
Ensure a Smooth, Professional Finish for Your Wooden Floors in Your London Home
Introduction
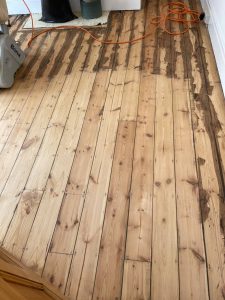
Before sanding your wooden floors, it’s crucial to address any uneven floorboards to achieve a smooth and professional finish. Uneven floorboards can result from various factors, including wear and tear, moisture, or improper installation. This guide provides step-by-step instructions on how to fix uneven floorboards before sanding, ensuring your floors look their best in your London home.
1. Identify the Problem Areas
The first step in fixing uneven floorboards is to identify the areas that need attention:
- Visual Inspection: Walk around the room and visually inspect the floor for any raised or sunken boards.
- Feel for Irregularities: Run your hand over the surface to feel for any unevenness.
- Use a Straightedge: Place a straightedge or a long level on the floor to detect any dips or high spots.
2. Secure Loose Boards
Loose floorboards can cause unevenness and need to be secured before sanding:
- Re-nail or Screw: Use finishing nails or screws to secure loose boards. Ensure the nails or screws are driven below the surface to avoid damaging the sanding equipment.
- Glue Down Loose Boards: Apply wood glue to the underside of loose boards and press them down firmly. Use weights or clamps to hold them in place until the glue dries.
3. Sand Down High Spots
High spots can be sanded down to create an even surface:
- Use a Belt Sander: A belt sander is effective for sanding down high spots. Be careful to sand evenly to avoid creating dips.
- Hand Sanding: For smaller areas, use a sanding block with coarse-grit sandpaper to sand down high spots.
- Check Progress: Frequently check your progress with a straightedge to ensure the surface is becoming even.
4. Fill Low Spots
Low spots need to be filled to create a level surface:
- Wood Filler: Use a high-quality wood filler to fill in low spots. Apply the filler with a putty knife, pressing it firmly into the gaps.
- Let It Dry: Allow the wood filler to dry completely according to the manufacturer’s instructions.
- Sand Smooth: Once the filler is dry, sand it smooth with fine-grit sandpaper to ensure it is level with the surrounding floor.
5. Replace Damaged Boards
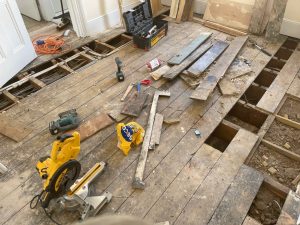
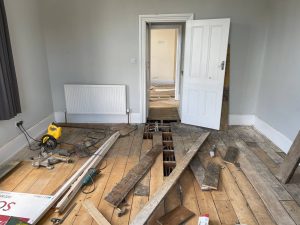
In some cases, damaged or warped boards may need to be replaced entirely:
- Remove the Damaged Board: Carefully remove the damaged board using a pry bar or a saw.
- Cut a Replacement: Measure and cut a new board to fit the space. Ensure the new board matches the existing wood type and finish.
- Install the New Board: Secure the new board in place with nails or screws, ensuring it is flush with the surrounding boards.
- Sand the Area: Sand the new board to match the level of the surrounding floor, ensuring a smooth transition.
6. Final Checks
Before proceeding with the full sanding process, perform final checks to ensure the floor is even:
- Use a Straightedge: Once again, use a straightedge to check the entire floor for any remaining uneven spots.
- Make Adjustments: Make any necessary adjustments, such as additional sanding or filling, to achieve a completely even surface.


Floor sanding and renovation and installation services in Bexley
Bexley: A Historic and Green London Borough Bexley is a charming borough located in the[Read more...]
How to Fix Uneven Floorboards Before Sanding
How to Fix Uneven Floorboards Before Sanding Ensure a Smooth, Professional Finish for Your[Read more...]
WOOD FLOOR SANDING AND LACQUERING/SEALING
[Read more...]
Expert Tips for Maintaining Sanded Floors
Sanding your wooden floors can breathe new life into your home, giving it a fresh,[Read more...]
How to Choose the Right Floor Sanding Method for Your Needs
How to Choose the Right Floor Sanding Method for Your Needs Introduction Choosing the[Read more...]
DIY Floor Sanding: Pros, Cons, and Tips
Floor sanding is a crucial step in restoring and maintaining the beauty of your wooden[Read more...]
How to Achieve a Rustic Look with Floor Sanding
How to Achieve a Rustic Look with Floor Sanding Transform your London home with[Read more...]
Floor Sanding for Open-Plan Spaces: Tips and Tricks
Floor Sanding for Open-Plan Spaces: Tips and Tricks Achieve a Seamless and Beautiful Finish[Read more...]
The Role of Temperature and Humidity in Floor Sanding
The Role of Temperature and Humidity in Floor Sanding When it comes to floor[Read more...]
The Costly Mistake of Improper Lead Paint Removal
The Costly Mistake of Improper Lead Paint Removal If your home was built[Read more...]