Sanding wooden floors is a meticulous process that involves using different grit sandpapers to achieve a smooth and flawless finish. Understanding the correct grit sequences is essential for anyone looking to restore or refinish their wooden floors. In this post, we’ll explore the importance of grit sequences in floor sanding and how to use them effectively in your London home.
What Are Grit Sequences?
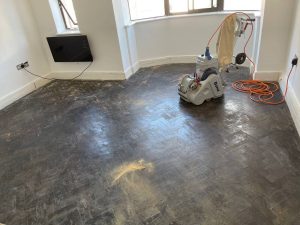
Grit sequences refer to the progression of sandpaper grits used during the sanding process. Sandpaper grit is measured by the number of abrasive particles per inch; the lower the number, the coarser the grit. Each grit level serves a specific purpose, starting with coarse grits to remove old finishes and imperfections, and moving to finer grits to smooth the wood and prepare it for finishing.
The Importance of Proper Grit Sequences
Using the correct grit sequence is crucial for several reasons:
Efficient Finish Removal: Coarse grits efficiently remove old finishes, paint, and deep scratches, making the initial sanding quicker and more effective.
Smooth Surface Preparation: Progressing through finer grits ensures that the wood surface becomes progressively smoother, readying it for staining or finishing.
Minimising Damage: Jumping to a fine grit too quickly can leave deep scratches or uneven surfaces, compromising the final finish.
Achieving Professional Results: Following a proper grit sequence results in a professional, high-quality finish that enhances the beauty of your wooden floors.
Common Grit Sequences for Floor Sanding
Here is a typical grit sequence used in floor sanding:
36-Grit: Start with a 36-grit sandpaper to remove old finishes and major imperfections. This coarse grit quickly cuts through the surface, preparing it for finer sanding.
60-Grit: Move to a 60-grit sandpaper to smooth out the scratches left by the 36-grit. This step begins to refine the surface, making it smoother.
80-Grit: Use an 80-grit sandpaper to further refine the wood surface. This medium grit helps eliminate the scratches from the 60-grit and prepares the wood for the finer grits.
100-Grit: A 100-grit sandpaper can be used to smooth the surface even more, ensuring that it’s ready for staining or finishing.
120-Grit: Finish with a 120-grit sandpaper to achieve a perfectly smooth surface, ideal for applying stains, varnishes, or other finishes.
Tips for Effective Sanding
To ensure the best results, follow these tips:
Test in a Small Area: Before starting, test your sanding sequence in a small, inconspicuous area to ensure it meets your expectations.
Keep the Sander Moving: Avoid leaving the sander in one spot for too long to prevent uneven sanding and gouges.
Vacuum Between Grits: Vacuum the floor thoroughly between each grit to remove dust and debris, ensuring a clean surface for the next sanding stage.
Inspect Regularly: Regularly inspect the floor for any missed spots or imperfections and address them before moving to the next grit.
Use the Right Equipment: Ensure you are using the appropriate sanding equipment for your floor type and project size.


How to Extend the Life of Your Sanded Floors
Sanded floors can dramatically enhance the aesthetic appeal and value of your home. To ensure[Read more...]
How to Clean Your Sanded Floors: Dos and Don’ts
How to Clean Your Sanded Floors: Dos and Don’ts Keep Your Wooden Floors Looking[Read more...]
Common Floor Sanding Mistakes and How to Avoid Them
Floor sanding is a fantastic way to rejuvenate your wooden floors, giving them a fresh,[Read more...]
Floor Sanding FAQs: Everything You Need to Know
Floor sanding is a popular method for rejuvenating wooden floors, but it often comes with[Read more...]
How to Choose the Right Floor Sanding Method for Your Needs
How to Choose the Right Floor Sanding Method for Your Needs Introduction Choosing the[Read more...]
Repairs
[Read more...]
How to Deal with High Traffic Areas on Sanded Floors
How to Deal with High Traffic Areas on Sanded Floors Protect and Maintain[Read more...]
The Ultimate Checklist for Floor Sanding Preparation
The Ultimate Checklist for Floor Sanding Preparation Ensure a Smooth and Efficient Floor Sanding[Read more...]
Floor sanding and renovation and installation services in Reading
Reading: A Historic Town with a Modern Edge Reading is a bustling town located in[Read more...]
How to Fix Uneven Floorboards Before Sanding
How to Fix Uneven Floorboards Before Sanding Ensure a Smooth, Professional Finish for Your[Read more...]