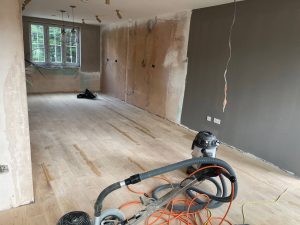
How to Plan a Floor Sanding Project Around Your Schedule

Efficient project management tips for your London home
Why Proper Planning is Crucial
Floor sanding is a significant home improvement project that requires careful planning to minimize disruption to your daily routine. Proper planning ensures that the project runs smoothly and is completed efficiently. Here’s how to plan a floor sanding project around your schedule:
Step 1: Assess the Scope of the Project
Begin by assessing the size and scope of your floor sanding project. Consider the following:
- Area Size: Measure the total area that needs sanding to estimate the time and resources required.
- Current Floor Condition: Evaluate the condition of your floors to determine the extent of sanding and repairs needed.
- Desired Finish: Decide on the type of finish you want, as this will impact the duration of the project.
Step 2: Choose the Right Time
Select a time for your floor sanding project that aligns with your schedule and minimizes inconvenience. Consider the following tips:
- Seasonal Considerations: Plan the project during a season with favourable weather conditions to ensure proper ventilation and drying times.
- Work and Family Commitments: Choose a period when you have fewer work and family obligations to allow you to focus on the project.
- Holiday Periods: Avoid scheduling the project during major holidays or events to prevent disruptions.
Step 3: Prepare Your Home
Proper preparation is key to a smooth floor sanding project. Follow these steps to get your home ready:
1. Clear the Area
Remove all furniture, rugs, and personal items from the area to be sanded. This ensures that the workspace is clear and allows for efficient sanding.
2. Protect Adjacent Areas
Cover doorways, windows, and vents with plastic sheeting to prevent dust from spreading to other parts of your home.
3. Inform Household Members
Notify all household members about the project timeline and any areas that will be off-limits during the sanding process.
Step 4: Hire Professionals or DIY?
Decide whether to hire professionals or tackle the project yourself. Consider the following:
- Experience and Skills: If you have experience with floor sanding and the necessary equipment, a DIY approach may be feasible. Otherwise, hiring professionals ensures quality results.
- Time and Convenience: Professional floor sanders can complete the project more quickly and efficiently, allowing you to stick to your schedule.
- Cost: Compare the cost of professional services versus renting equipment and purchasing materials for a DIY project.
Step 5: Manage the Project Timeline
Effective project management is essential to keep your floor sanding project on track. Follow these tips:
1. Set a Realistic Timeline
Work with your contractor to establish a realistic timeline for the project. Consider factors such as drying times for finishes and potential delays.
2. Communicate Regularly
Maintain open communication with your contractor or team to address any issues promptly and keep the project on schedule.
3. Monitor Progress
Regularly check the progress of the project to ensure it is proceeding as planned. Make adjustments to the timeline if necessary.
Step 6: Post-Project Cleanup
After the sanding and finishing are complete, follow these steps for post-project cleanup:
- Remove Dust and Debris: Thoroughly clean the area to remove any dust and debris left behind from the sanding process.
- Rearrange Furniture: Carefully move furniture and items back into the area, using protective pads to prevent scratches on your newly sanded floors.
- Inspect the Work: Conduct a final inspection to ensure the project meets your expectations and address any remaining concerns.
Conclusion
Proper planning is essential for a successful floor sanding project that fits seamlessly into your schedule. By assessing the scope, choosing the right time, preparing your home, deciding on professional help, managing the timeline, and performing post-project cleanup, you can achieve beautiful, well-maintained floors with minimal disruption. For expert floor sanding services and advice in London, contact us today. Our team is here to help you with all your floor renovation needs.


Expert Tips for Maintaining Sanded Floors
Sanding your wooden floors can breathe new life into your home, giving it a fresh,[Read more...]
How to Handle Floor Stains from Pets
How to Handle Floor Stains from Pets Pets bring joy and companionship to our homes,[Read more...]
Gallery 06 – Pine floor board
[Read more...]
Sep
How to Deal with Floor Cupping and Crowning Before Sanding
How to Deal with Floor Cupping and Crowning Before Sanding Effective methods[Read more...]
Wood floor polishing
[Read more...]
Floor sanding and renovation and installation services in Hertfordshire
Hertfordshire: A County of Scenic Beauty and Modern Living Hertfordshire is a picturesque county in[Read more...]
Floor Sanding for Open-Plan Spaces: Tips and Tricks
Floor Sanding for Open-Plan Spaces: Tips and Tricks Achieve a Seamless and Beautiful Finish[Read more...]
The Ultimate Checklist for Floor Sanding Preparation
The Ultimate Checklist for Floor Sanding Preparation Ensure a Smooth and Efficient Floor Sanding[Read more...]
How to Incorporate Floor Sanding into Your DIY Projects
How to Incorporate Floor Sanding into Your DIY Projects For London homeowners looking to[Read more...]
Stair sanding
[Read more...]