How to Incorporate Floor Sanding into Your Home Renovation
Transform your London home with expertly sanded floors
Why Include Floor Sanding in Your Renovation?
Floor sanding can be a game-changer in any home renovation project. It revitalises old, worn-out wooden floors, bringing new life and enhancing the overall aesthetic appeal of your home. Here’s why floor sanding should be a key part of your renovation plans:
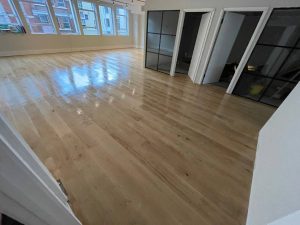
- Enhanced Aesthetics: Sanded floors reveal the natural beauty of the wood, adding elegance and sophistication to your interiors.
- Increased Durability: Properly sanded and finished floors are more resistant to wear and tear, extending their lifespan.
- Improved Home Value: Well-maintained wooden floors are a desirable feature for potential buyers, increasing your property’s market value.
Steps to Incorporate Floor Sanding
Incorporating floor sanding into your renovation project involves several key steps. Here’s a comprehensive guide to help you through the process:
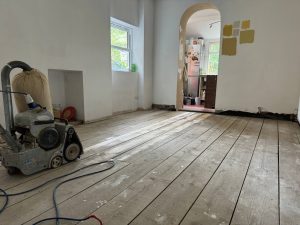
1. Assess the Condition of Your Floors
Before starting, inspect your floors to determine if they are suitable for sanding. Look for signs of damage, such as deep scratches, stains, or warped boards. Consult a professional if you’re unsure about the condition of your floors.
2. Choose the Right Time
Schedule the sanding process during a phase of your renovation when other heavy-duty tasks are complete. This ensures that the floors are not damaged by ongoing construction work.
3. Select Quality Sanding Products
Invest in high-quality sandpaper and sanding equipment. This will ensure a smooth, even finish and prevent damage to your floors. Consider eco-friendly options for a sustainable renovation.
4. Prepare the Area
Clear the room of all furniture and cover any fixtures that cannot be moved. Ensure the space is well-ventilated to manage dust and fumes effectively.
5. Hire Professional Sanding Services
For the best results, hire experienced professionals. They have the expertise and equipment to deliver a flawless finish, saving you time and effort.
6. Choose the Right Finish
After sanding, select a finish that complements your interior design. Options include varnish, oil, or wax, each offering different levels of protection and sheen.
Benefits of Professional Floor Sanding
While DIY sanding is an option, hiring professionals offers several advantages:
- Expertise: Professionals have the skills to handle various types of wood and floor conditions.
- Efficiency: Experienced sanders can complete the job quickly and with minimal disruption to your renovation timeline.
- Quality Finish: Professional sanding ensures a smooth, even surface, enhancing the overall look of your floors.
If you’re ready to incorporate floor sanding into your home renovation in London, contact us today. Our team of experts is here to help you achieve stunning results for your wooden floors.


Modern Wood Finishing: Key Findings for Protecting Your Floors
Modern Wood Finishing: Key Findings for Protecting Your Floors At Alchemist Floor Sanding, we[Read more...]
The Best Tools and Equipment for DIY Floor Sanding
The Best Tools and Equipment for DIY Floor Sanding Ensure Professional Results in Your[Read more...]
The Role of Floor Sanding in Home Staging
The Role of Floor Sanding in Home Staging Enhance your London home’s appeal with[Read more...]
How to Plan a Floor Sanding Project for Multi-Story Homes
How to Plan a Floor Sanding Project for Multi-Story Homes Planning a floor sanding project[Read more...]
How to Protect Your Furniture During Floor Sanding
How to Protect Your Furniture During Floor Sanding Expert Tips to Keep Your Belongings[Read more...]
The Role of Temperature and Humidity in Floor Sanding
The Role of Temperature and Humidity in Floor Sanding When it comes to floor[Read more...]
How Floor Sanding Can Transform Your London Home
Living in London comes with the charm of historic architecture and classic interiors. However, maintaining[Read more...]
The Best Floor Sanding Practices for Allergy Sufferers
The Best Floor Sanding Practices for Allergy Sufferers For allergy sufferers, maintaining a clean[Read more...]
Floor Sanding for Open-Plan Spaces: Tips and Tricks
Floor Sanding for Open-Plan Spaces: Tips and Tricks Achieve a Seamless and Beautiful Finish[Read more...]
The Best Floor Sanding Practices for Older Homes
The Best Floor Sanding Practices for Older Homes Older homes in London often feature beautiful[Read more...]