Achieve the Best Results for Your London Home
Introduction
Sanding wooden floors is a great way to restore their beauty and prolong their life. However, before you begin sanding, it’s essential to address any stains and imperfections to ensure a smooth and flawless finish. In this guide, we’ll provide expert tips on how to handle stains and imperfections on your wooden floors before sanding, helping you achieve the best results for your London home.
Identify the Types of Stains
Different types of stains require different treatments. Identifying the type of stain on your floor is the first step:
- Water Stains: Usually appear as dark spots and are caused by water damage.
- Pet Stains: Often result in dark or discoloured spots with a distinct odour.
- Oil and Grease Stains: Appear as dark, slick spots on the wood surface.
- Ink and Dye Stains: Create dark, permanent marks on the wood.
Preparing for Stain Removal
Before tackling stains, prepare your work area:
- Remove all furniture and rugs from the room.
- Clean the floor thoroughly to remove dust and debris.
- Ensure proper ventilation by opening windows and doors.
- Gather necessary materials such as sandpaper, wood cleaner, and stain removers.
Removing Water Stains
To remove water stains, follow these steps:
- Sand the Area: Lightly sand the stained area with fine-grit sandpaper to remove the surface layer of the stain.
- Apply Oxalic Acid: Mix oxalic acid with water to create a paste. Apply it to the stain and let it sit for a few hours before wiping it off.
- Rinse and Dry: Rinse the area with clean water and dry it thoroughly.
Removing Pet Stains

Pet stains can be challenging to remove due to their odour and discoloration:
- Sand the Area: Sand the stained area with fine-grit sandpaper to remove the surface layer.
- Use Hydrogen Peroxide: Apply hydrogen peroxide to the stain and cover it with a cloth. Let it sit for several hours to bleach the stain.
- Neutralise Odour: Use a mixture of baking soda and water to neutralise any remaining odour. Rinse and dry the area.
Removing Oil and Grease Stains
To remove oil and grease stains, follow these steps:
- Absorb Excess Oil: Sprinkle baking soda or talcum powder on the stain to absorb excess oil. Let it sit for a few hours, then vacuum it up.
- Apply Dish Soap: Mix dish soap with warm water and apply it to the stain. Scrub gently with a soft brush.
- Rinse and Dry: Rinse the area with clean water and dry it thoroughly.
Removing Ink and Dye Stains
Ink and dye stains can be stubborn but can be removed with patience:
- Sand the Area: Lightly sand the stained area with fine-grit sandpaper to remove the surface layer of the stain.
- Apply Alcohol: Dab the stain with a cloth soaked in rubbing alcohol. Be careful not to oversaturate the wood.
- Rinse and Dry: Rinse the area with clean water and dry it thoroughly.
Handling Imperfections
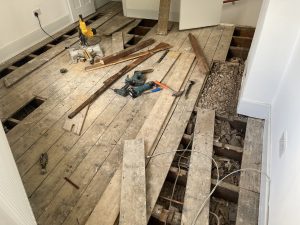
In addition to stains, it’s essential to address any imperfections before sanding:
- Fill Cracks and Gaps: Use wood filler to fill any cracks and gaps in the floor. Allow it to dry completely before sanding.
- Repair Loose Boards: Secure any loose boards with finishing nails or wood screws to prevent movement during sanding.
- Replace Damaged Boards: Replace any severely damaged or rotten boards to ensure a smooth and even surface.


How to Prepare Your Home for Floor Sanding
Preparing your home for floor sanding is a crucial step to ensure a smooth and[Read more...]
Sand Hard Wood Flooring
Even the best wood floors are subject to damage. With time, hardwood floors scratch, dull,[Read more...]
How to Handle Floor Gaps and Cracks Before Sanding
How to Handle Floor Gaps and Cracks Before Sanding Expert Tips to Ensure a[Read more...]
How to Deal with Pet Damage on Wooden Floors
How to Deal with Pet Damage on Wooden Floors Effective solutions for maintaining beautiful[Read more...]
How to Handle Heavy Furniture on Sanded Floors
How to Handle Heavy Furniture on Sanded Floors Protect your wooden floors from[Read more...]
Top Floor Sanding Trends in 2024
As we move into 2024, floor sanding and finishing techniques continue to evolve, blending innovation[Read more...]
How to Deal with Floor Squeaks: Sanding and Repair Tips
How to Deal with Floor Squeaks: Sanding and Repair Tips Ensure Quiet and Smooth[Read more...]
Cork Tile Sanding
Cork is an environmentally friendly, green resource for flooring, easy to maintain, provides thermal and[Read more...]
The Benefits of Floor Sanding for Pet Owners
The Benefits of Floor Sanding for Pet Owners As a pet owner, maintaining beautiful[Read more...]
Floor sanding and renovation and installation services in Essex
Essex: A County of Charm and Diversity Essex is a historic and picturesque county located[Read more...]