
The Best Practices for Sanding Oak Floors
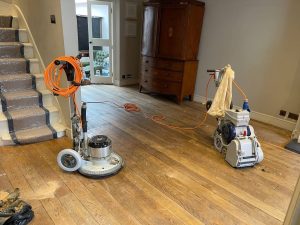
Expert Tips and Techniques for Achieving a Smooth, Professional Finish in Your London Home
Introduction
Oak floors are a popular choice for many homeowners due to their durability, natural beauty, and timeless appeal. However, to maintain their elegance and longevity, proper sanding is essential. In this guide, we will share the best practices for sanding oak floors, helping you achieve a smooth, professional finish in your London home.
1. Preparation
Proper preparation is crucial for a successful sanding project:
- Clear the Area: Remove all furniture, rugs, and personal items from the room. Ensure the floor is completely free of obstacles.
- Clean Thoroughly: Vacuum the floor to remove dust, dirt, and debris. Use a damp cloth to wipe down the surface, ensuring it is clean and dry.
- Repair Any Damage: Inspect the floor for any damage, such as loose boards, nails, or deep scratches. Repair these issues before starting the sanding process.
2. Choosing the Right Equipment
Using the right equipment is essential for achieving the best results:
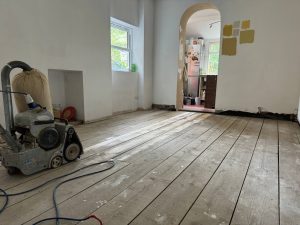
- Drum Sander: Ideal for sanding large, flat areas. It is powerful and effective for removing old finishes and leveling the surface.
- Edge Sander: Used for sanding edges and corners that the drum sander cannot reach. Ensures a consistent finish across the entire floor.
- Detail Sander: Useful for intricate areas and tight spaces where larger sanders are not effective.
- Vacuum Cleaner: A vacuum with a HEPA filter is essential for cleaning between sanding passes and ensuring a dust-free surface.
3. Sanding Process
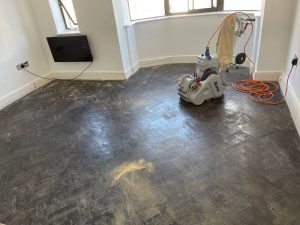
Follow these steps for a smooth sanding process:
- Start with Coarse Grit: Begin with a coarse grit sandpaper (36-40) to remove old finishes and level the surface. Sand in the direction of the wood grain to prevent scratches.
- Medium Grit: Move to a medium grit sandpaper (60-80) to smooth out the rough surface left by the coarse grit. This step helps to refine the floor’s surface.
- Fine Grit: Finish with a fine grit sandpaper (100-120) to achieve a smooth, even finish. This final sanding prepares the floor for staining or finishing.
- Edge and Detail Sanding: Use an edge sander and detail sander to reach edges and tight spaces. Ensure these areas are sanded smoothly and consistently with the main floor.
- Vacuum Between Passes: Clean the floor thoroughly with a vacuum after each sanding pass to remove dust and debris. This ensures a clean surface for the next sanding stage.
4. Staining and Finishing
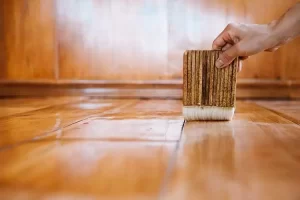
Applying a finish is the final step in achieving a beautiful oak floor:
- Choose the Right Stain: If you wish to change the color of your oak floor, choose a stain that complements your home’s decor. Test the stain on a small area to ensure it meets your expectations.
- Apply Evenly: Use a brush, roller, or applicator pad to apply the stain evenly across the floor. Follow the manufacturer’s instructions for drying times.
- Protective Finish: Apply a protective finish, such as polyurethane, to seal and protect the wood. Water-based finishes dry quickly and have low VOC levels, while oil-based finishes offer greater durability.
- Multiple Coats: Apply multiple coats of finish, allowing each coat to dry thoroughly before applying the next. Lightly sand between coats for a smooth, even finish.
5. Maintenance Tips
Proper maintenance is essential for keeping your oak floors looking beautiful:
- Regular Cleaning: Sweep or vacuum regularly to remove dirt and debris. Use a damp mop with a mild cleaner designed for wooden floors.
- Protect from Moisture: Avoid excessive water and clean up spills immediately to prevent water damage.
- Use Rugs and Mats: Place rugs in high-traffic areas and entryways to reduce wear and tear. Use non-slip pads to prevent movement.
- Furniture Pads: Attach felt pads to the legs of furniture to prevent scratches and dents.




What to Expect During a Floor Sanding Project
What to Expect During a Floor Sanding Project Preparing for a Smooth and Successful[Read more...]
How to Create a Vintage Look with Floor Sanding and Finishing
How to Create a Vintage Look with Floor Sanding and Finishing Creating a vintage[Read more...]
How to Maintain the Shine on Your Sanded Floors
How to Maintain the Shine on Your Sanded Floors Expert Tips for Keeping Your[Read more...]
The Best Finishes for Sanded Floors: A Comprehensive Guide
Choosing the right finish for your sanded floors is crucial in achieving the perfect look[Read more...]
Step-by-Step Floor Sanding Process for Beginners
If you’re a homeowner in London looking to rejuvenate your wooden floors, floor sanding can[Read more...]
The Best Practices for Sanding Oak Floors
The Best Practices for Sanding Oak Floors Expert Tips and Techniques for Achieving a[Read more...]
The Lifespan of Sanded Floors: What to Expect
Sanded floors can significantly enhance the beauty and value of your home, especially in a[Read more...]
Cost Guide: How Much Does Floor Sanding in London Cost?
If you’re looking to rejuvenate your wooden floors and enhance the beauty of your home,[Read more...]
The Difference Between Water-Based and Oil-Based Finishes
The Difference Between Water-Based and Oil-Based Finishes Choosing the Best Finish for Your Wooden[Read more...]
Floor sanding and renovation and installation services in Putney
Putney: A Riverside Gem in Southwest London Putney is a charming and affluent district located[Read more...]