The Best Practices for Sanding Pine Floors

Achieve a beautiful finish with these tips and techniques for your London home
Understanding Pine Floors
Pine is a popular choice for wooden floors due to its natural beauty and affordability. However, pine is softer than hardwoods like oak, making it more susceptible to scratches and dents. Proper sanding is crucial to restoring and maintaining pine floors. Here are the best practices for sanding pine floors:
Preparation
Proper preparation is key to successful sanding. Follow these steps to prepare your pine floors:
1. Clear the Area
Remove all furniture, rugs, and personal items from the room. This ensures a clear workspace and prevents dust from settling on your belongings.
2. Clean the Floors
Thoroughly clean the floors to remove dirt, dust, and debris. This step is essential for achieving a smooth sanding process and a flawless finish.
3. Inspect for Damage
Check your floors for any signs of damage, such as deep scratches, stains, or loose boards. Repair any issues before you begin sanding to ensure a consistent finish.
Sanding Techniques
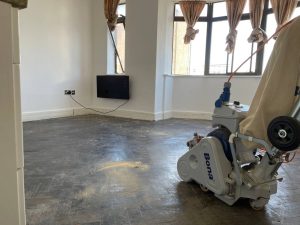
Using the right techniques and tools is crucial for sanding pine floors. Here are the steps to follow:
1. Choose the Right Sandpaper Grit
Start with a coarser grit sandpaper, such as 60 or 80, to remove old finishes and level the surface. Progress to finer grits, such as 100 and 120, for a smooth finish.
2. Use the Right Equipment
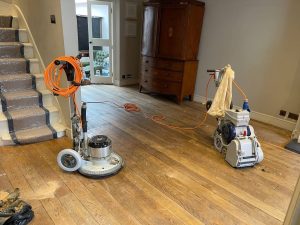
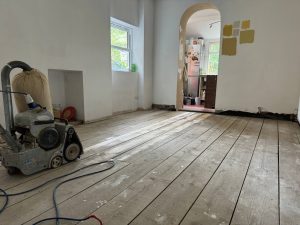
Rent a drum sander for large areas and an edge sander for corners and edges. Ensure the sanders are in good condition and equipped with the appropriate sandpaper.
3. Sand with the Grain
Always sand in the direction of the wood grain to prevent scratches and achieve a smooth finish. Overlapping passes ensure even sanding.
4. Be Gentle
Pine is a softwood, so avoid pressing too hard with the sander. Let the machine do the work to prevent gouging the wood.
Finishing Touches
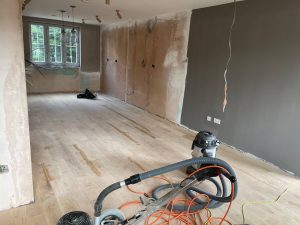
After sanding, the finishing touches are crucial to protect and enhance the beauty of your pine floors:
1. Vacuum and Clean
Thoroughly vacuum the floors to remove all dust and debris. Wipe the surface with a damp cloth to ensure it’s clean and ready for finishing.
2. Apply Stain (Optional)
If you want to change the colour of your pine floors, apply a wood stain. Follow the manufacturer’s instructions for application and drying times.
3. Seal the Floors
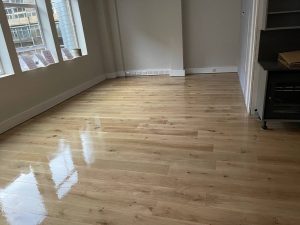
Apply a sealant or finish to protect the wood and enhance its appearance. Polyurethane is a popular choice for its durability and ease of application. Apply multiple thin coats, allowing each coat to dry completely before applying the next.
Maintenance Tips
Maintaining your pine floors properly will keep them looking beautiful for years to come. Here are some maintenance tips:
- Regular Cleaning: Sweep or vacuum regularly to remove dirt and prevent scratches. Use a damp mop with a gentle cleaner designed for wood floors.
- Protect from Furniture: Place felt pads under furniture legs to prevent scratches and dents. Avoid dragging heavy furniture across the floor.
- Control Humidity: Maintain a consistent indoor humidity level to prevent the wood from expanding and contracting, which can cause damage.
- Refinish as Needed: Over time, your pine floors may need to be refinished to maintain their appearance. Follow the same sanding and finishing steps to restore their beauty.
Professional Help
Sanding and finishing pine floors can be challenging, especially if you’re not experienced. For the best results, consider hiring professional floor sanding services. If you’re in London and need expert assistance, contact us today. Our experienced team is here to help you restore and maintain the beauty of your pine floors.




The Best Floor Sanding Techniques for High-Traffic Areas
The Best Floor Sanding Techniques for High-Traffic Areas Maintaining the beauty and durability of[Read more...]
Floor Board Restoration
Restoration Whilst you may believe that floor sanding itself is classed as restoration, floor restoration[Read more...]
Wood Floor Maintenance
[Read more...]
Understanding Grit Sequences in Floor Sanding
Understanding Grit Sequences in Floor Sanding Achieving the Perfect Finish for Your London Home[Read more...]
Gallery 07 – Pine floor board
[Read more...]
Can You Sand Bamboo Floors? What You Need to Know
Can You Sand Bamboo Floors? What You Need to Know Expert Tips for Maintaining[Read more...]
Floor Sanding and Allergies: Creating a Healthier Home
Living in a vibrant city like London offers many benefits, but it also means dealing[Read more...]
How to Spot Signs That Your Floors Need Sanding
Maintain the Beauty of Your London Home with Expert Tips Introduction Wooden floors add[Read more...]
How to Incorporate Floor Sanding into Your Home Renovation
How to Incorporate Floor Sanding into Your Home Renovation Transform your London home with[Read more...]
Floor Board Fitting
Installing, Fitting, sanding and finishing different types of flooring takes a lot of work. when[Read more...]
Sep