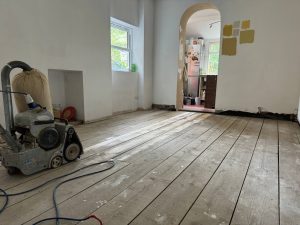
Older homes in London often feature beautiful hardwood floors that have stood the test of time. However, maintaining and restoring these vintage floors requires special care and attention. Proper floor sanding practices can help bring out the natural beauty of these historic features while preserving their integrity. This guide provides expert tips on the best floor sanding practices for older homes, ensuring your floors remain stunning and durable for years to come.
Understanding the Condition of Your Floors
Before starting any sanding project, it’s essential to assess the condition of your floors:
Inspect for Damage: Check for signs of damage such as deep scratches, gouges, loose boards, or water damage. Address these issues before sanding to ensure a smooth and even surface.
Identify the Finish: Determine the type of finish currently on the floors. This helps in choosing the appropriate sanding technique and finish for restoration.
Measure the Thickness: Older floors may have been sanded multiple times, reducing their thickness. Ensure there is enough wood left to sand without compromising the floor’s stability.
Preparation Steps
1. Clear the Area
Remove all furniture, rugs, and decor from the room. Ensure the space is completely clear to facilitate the sanding process and prevent damage to your belongings.
2. Repair and Secure
Repair any damage identified during the inspection. Secure loose boards, fill gaps and cracks with wood filler, and address any water damage. This preparation ensures a smooth sanding process and a better finish.
3. Protect Adjacent Areas
Use plastic sheeting and painter’s tape to cover doorways, vents, and adjacent rooms. This helps contain dust and prevents it from spreading throughout your home.
Sanding Techniques
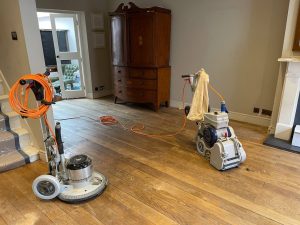
1. Choose the Right Equipment
Using the right sanding equipment is crucial for achieving a smooth and even finish. For older floors, an orbital sander is often preferred over a drum sander, as it is less aggressive and reduces the risk of damaging the wood.
2. Start with Coarse Grit Sandpaper
Begin sanding with coarse grit sandpaper (60-80 grit) to remove old finishes and level the surface. Sand in the direction of the wood grain to avoid scratches and achieve a uniform finish.
3. Progress to Medium and Fine Grits
Once the initial sanding is complete, switch to medium grit (100-120 grit) sandpaper to smooth the surface. Finally, use fine grit (150-180 grit) sandpaper for a polished finish. Vacuum the floor between each sanding stage to remove dust and debris.
4. Detail Sanding for Intricate Areas
For intricate areas, such as corners and edges, use a detail sander to ensure a consistent finish. Work slowly and carefully to preserve the integrity of the wood and achieve a smooth result.
Finishing Touches
1. Clean Thoroughly
After sanding, vacuum the floors thoroughly to remove all dust. Wipe down the surface with a damp cloth to ensure it’s completely clean before applying any finish.
2. Choose the Right Finish
Select a finish that enhances the beauty of your vintage floors and provides durable protection. Water-based polyurethanes are a good choice for clear finishes that do not yellow over time. Oil-based polyurethanes offer a rich, warm finish but may darken the wood slightly.
3. Apply Finish Evenly
Apply the finish evenly using a high-quality brush, roller, or applicator pad. Follow the manufacturer’s instructions for application and drying times. Ensure the room is well-ventilated during the finishing process to facilitate proper drying and curing.
4. Multiple Coats for Durability
For the best results, apply multiple thin coats of finish rather than one thick coat. This ensures a smooth, even finish and provides better protection for your floors. Lightly sand between coats with fine grit sandpaper to achieve a flawless finish.
Maintenance Tips
Keep your newly sanded and finished floors looking their best with these maintenance tips:
Regularly sweep or vacuum to remove dirt and debris.
Use a damp mop with a hardwood floor cleaner for deeper cleaning, but avoid excessive water.
Place mats at entryways to catch dirt and moisture.
Use furniture pads to prevent scratches and dents.
Refinish the floors as needed to maintain their appearance and durability.
Conclusion
Sanding and maintaining the floors in older homes requires careful preparation, the right techniques, and proper finishing to preserve their historic beauty and enhance their durability. By following these expert tips, you can ensure your vintage hardwood floors in your London home remain stunning and long-lasting. For professional floor sanding and finishing services, contact our experienced team today. We are dedicated to providing high-quality solutions to keep your floors in top condition.


How to Choose the Right Sandpaper for Floor Sanding
How to Choose the Right Sandpaper for Floor Sanding Ensure a Smooth and Professional[Read more...]
Engineered Wood Flooring
Choosing the finishes for your house can be the most exciting part. Wood flooring adds[Read more...]
Sep
The Lifespan of Sanded Floors: What to Expect
Sanded floors can significantly enhance the beauty and value of your home, especially in a[Read more...]
Wood floor nailing
[Read more...]
How to Maintain Sanded Floors in Rental Properties
How to Maintain Sanded Floors in Rental Properties Maintaining sanded floors in rental properties[Read more...]
Floor Sanding for Stairs: Techniques and Tips
Floor Sanding for Stairs: Techniques and Tips Enhance the beauty and longevity[Read more...]
The Best Practices for Sanding Oak Floors
The Best Practices for Sanding Oak Floors Expert Tips and Techniques for Achieving a[Read more...]
The Best Rugs and Mats for Protecting Sanded Floors
The Best Rugs and Mats for Protecting Sanded Floors Maintain your wooden floors with[Read more...]
The Importance of Ventilation During Floor Sanding
The Importance of Ventilation During Floor Sanding Expert Tips to Ensure a Safe and[Read more...]
WOOD FLOORING SANDING AND OILING
[Read more...]