The Role of Temperature and Humidity in Floor Sanding

When it comes to floor sanding, understanding the impact of temperature and humidity is crucial for achieving optimal results. Both factors significantly influence the sanding process and the final finish of your floors. For homeowners in London, where weather conditions can vary, it’s important to consider these elements carefully. This guide will explore the role of temperature and humidity in floor sanding and provide tips to ensure the best outcomes for your home improvement projects.
Why Temperature and Humidity Matter
Temperature and humidity levels affect how wood behaves during the sanding and finishing processes. Wood is a natural material that expands and contracts with changes in moisture and temperature, which can impact the smoothness and durability of the finish.
Temperature Considerations
Maintaining the right temperature is essential for a successful sanding project:
- Ideal Temperature Range: The optimal temperature range for sanding and finishing wood floors is between 18°C to 24°C (65°F to 75°F). This range helps ensure the finish adheres properly and dries evenly.
- Avoid Extreme Temperatures: High temperatures can cause finishes to dry too quickly, leading to a rough, uneven surface. Conversely, low temperatures can slow down the drying process, resulting in a sticky finish.
Humidity Considerations
Humidity levels also play a vital role in the floor sanding process:
- Optimal Humidity Levels: The ideal relative humidity for sanding and finishing wood floors is between 40% and 60%. This range prevents excessive wood movement and ensures a stable, smooth finish.
- High Humidity: High humidity can cause wood to absorb moisture and swell, making sanding difficult and potentially leading to a bumpy finish. It can also prolong the drying time of the finish, increasing the risk of imperfections.
- Low Humidity: Low humidity can cause wood to lose moisture and shrink, leading to gaps and cracks in the floor. This condition can also make the finish dry too quickly, resulting in a less durable surface.
Preparing for Floor Sanding
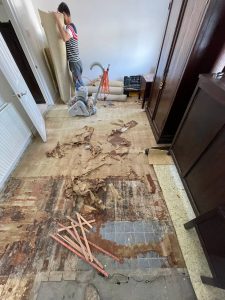
1. Monitor the Environment
Before starting your floor sanding project, monitor the temperature and humidity levels in your home. Use a hygrometer to measure relative humidity and a thermometer to check the temperature. Adjust indoor conditions as needed to maintain optimal levels.
2. Control Indoor Climate
To control temperature and humidity indoors, consider using air conditioning, dehumidifiers, or humidifiers. These tools help create a stable environment, ensuring the best conditions for sanding and finishing your floors.
3. Allow Wood to Acclimate
Let your wood floors acclimate to the indoor environment for at least 48 hours before sanding. This process helps the wood adjust to the temperature and humidity levels, reducing the risk of excessive expansion or contraction during sanding.
Sanding and Finishing Tips
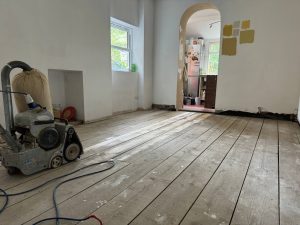
1. Sand Gradually
Start with a coarse grit sandpaper and gradually move to finer grits. This approach ensures a smooth surface and reduces the risk of sanding imperfections caused by temperature and humidity fluctuations.
2. Apply Finish Evenly
Apply the finish evenly and follow the manufacturer’s instructions regarding drying times. Maintain the recommended temperature and humidity levels throughout the drying process to achieve a durable, smooth finish.
3. Allow Adequate Drying Time
Be patient and allow each coat of finish to dry completely before applying the next. Proper drying time is essential for a long-lasting, high-quality finish.
Conclusion
Understanding the role of temperature and humidity in floor sanding is essential for achieving the best results. By maintaining optimal conditions and following expert tips, you can ensure a smooth, durable finish for your wood floors. For professional floor sanding services in London, our team is here to help. Contact us today to learn more about how we can assist with your home improvement projects and ensure beautiful, long-lasting floors.


How to Choose the Right Floor Sanding Method for Your Needs
How to Choose the Right Floor Sanding Method for Your Needs Introduction Choosing the[Read more...]
How to Handle Adhesive Residue Before Floor Sanding
How to Handle Adhesive Residue Before Floor Sanding Effective methods to prepare your[Read more...]
Buffing and one coat finish
[Read more...]
The Benefits of Professional Floor Sanding for Offices
The Benefits of Professional Floor Sanding for Offices Maintaining the floors in your office[Read more...]
Floor Board Restoration
Restoration Whilst you may believe that floor sanding itself is classed as restoration, floor restoration[Read more...]
Floor Finishes
Making a start on your wooden floor finish. Timber floors require a protective coating to[Read more...]
Wood Floor Reclaiming – Floorboard Replacement
[Read more...]
Polishing the floor in london
[Read more...]
Floor sanding and renovation and installation services in Greenwich
Greenwich: A Historic Gem of London Greenwich is one of London’s most historic and picturesque[Read more...]
Fire hearth removal
[Read more...]